Thursday, 5 May 2016

Day 7 final piece

Today i have used the enginearing laith to cut the 6mm rod to make the magnets for the pickups for the guitar. To cut these i would measure out 4mm on the rod and would then use the laith to turn the rod and for me to then controle the blade to cut the rod to the measurement which i had etched.
Here i have taken the wood for the pick up and measured it out to be 67mm i have then cut 4 out to then drill in 6 holes. The wood kept splitting in some spots because i was drilling the holes with too much force too quickly so i had to re-measure 4 more and cut them out using 2 slats of wood either side of the wood i was drilling, this meant the force bearing down on the wood would be exerted in a different direction causing them not to split. Finally once i had the pick ups cut out i had to put them all together. 
Once i had all the pieces i went and filed down the holes in the wood to get then to the right size and smoothed out so then they would be easy to fit the magnets into. The magnets i then filed down and pushed into the wood. Then i pushed the magnets up a little to make them raised, once in position i glued them all down so they wouldn't move and were kept raised.
The next step is to now re work the body to make it look old and worn using files, sand paper and other machines to make it have an old, worn finish.

Day 5 final piece

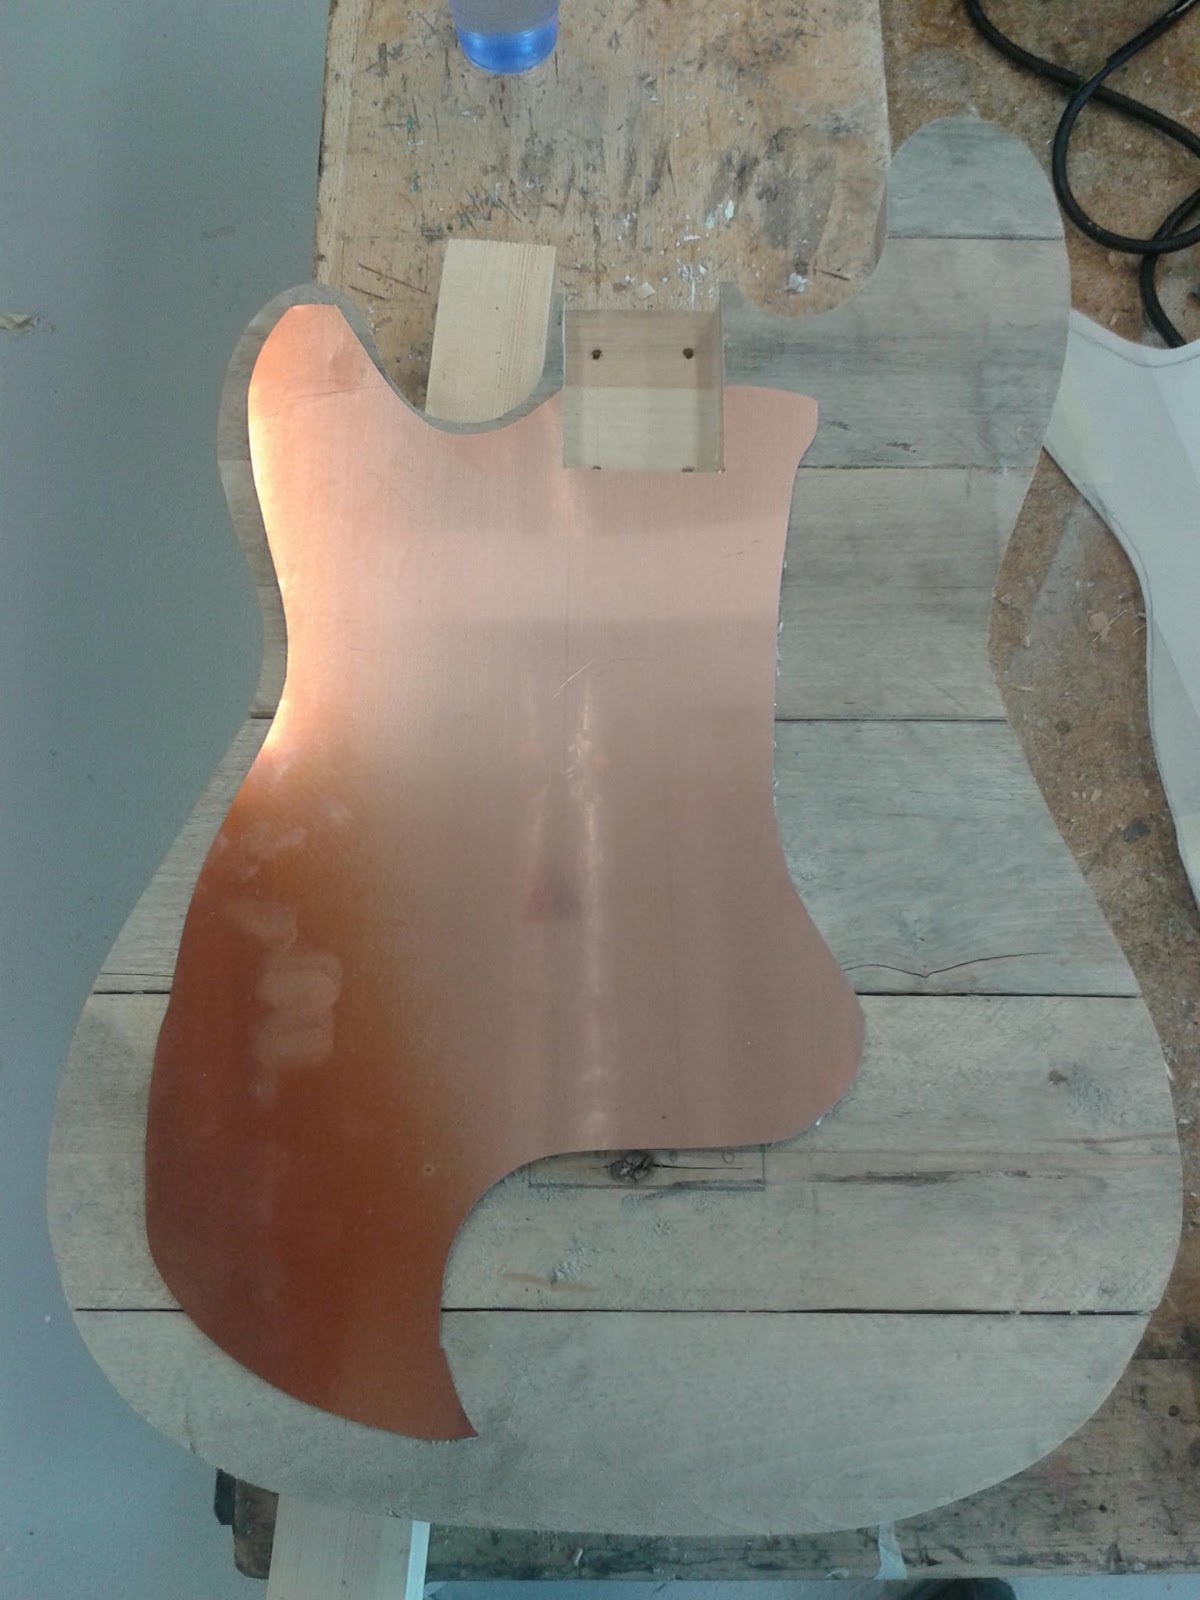
To start out i had to draw out the design i had for my scratch plate onto some tracing paper to make sure it would fit on to the guitar body as well as so it could be taped down on to the copper to be cut out to get the shape i wanted as best cut out as possible. 
Once drawn out i taped it to the copper sheet and cut part of the sheet off making sure the other part could be used as much as possible if needed and to make it easier to move when cutting out my scratch plate on the band saw.
Once cut out to shape i then filed the copper down and smoothed out the edges to make it look like more of a rounded, nice flowing shape. 
Now that the copper is cut and fits every part its now time to sand it down to be etched into and stained.

Day 6 final piece

First off i wanted to use lyrics that meant something to me, something that would give the guitar meaning like i said i wanted to besides it looking old and worn so i drew out a silohet of me and my brother standing on the beach watching the sun set, this shows a brothers love, something that can stand the test of time just like i want the guitar to appear, like it has stood the test of time. 
To do this i cut out a stencil on tracing paper so then when the ink was used it wouldnt go any where else on the copper and disfigure the copper sheet where I wouldn't want it to be disfigured. This did not go to plan as when the polishing ink was painted on it blead underneath the tracing and so the ink was disfigured.
To make the silohet back into the shape it was supposed to be i used an etching tool to scratch away the black polish where I didn't want it to be, to make the silohet actually look like the image it was supposed to. Once i had done this it was then time to use the stop out pen to write on the lyrics, this didn't go to plan the first time round and so luckily i had some wire wool to scratch away the lyrics which were in the wrong place. This then gave me space to draw out where the pick ups would go and to then re-right the lyrics on in a better position.
Once i had put all the ink on the scratch plate and taped up the back so that the acid wouldn't eat away at the back and leave me with nothing,it was then time to put it in the acid bath. The stop out ink would leave the areas covered raised up where as the un covered areas the acid would eat away at the copper and leave a shiny finish.
After 10 minutes in the acid bath it was time to put into the water bath to stop the acidic reaction and so that we could pick it up with our hands without being burnt or our skin being stained. Then it was to sand the scratch plate down with wire wool and take off the polish to leave a shiny copper surface on the scratch plate which would then be ready to stain.
Here is the finished copper plate on the guitar once stained. From the glare of the light you can see the raised lyrics and silohet of me and my brother. The staining effect was after it was blackened, after fully blackened i then used wire wool to make the scratch plate look old, battered and burned and so it would bring out the lyrics and the silohet even more than they were before hand.

Day 3 final piece

Now that the wood was ready for cutting out into the shape of the guitar i drew a tracing for the body to then be taped down with masking tape so it would stay on the wood when cutting on the band saw and it wouldn't mark the wood or damage it.
Once the tracing was to my liking and finalised to fit the wood with space incase of error i then went to the band saw to cut the body out. 
Once cut out the body had a few jaggered edges so to get rid off these i used the sanding machine to smooth out the straight edges of the guitar and then for the curved and inside edges which i could not get to i used the bobbing sander, a machine that had a band of sandpaper going round so that you can sand pieces that may need to be sanded on the inside that cannot be sanded by the sanding machine as it may not be able to reach the area.
Now that this was done i needed to route out the space for the neck piece so i drew out the space which needed to be routed and left it for the next day.

Day 4 final piece

Day 4 would be the day to route out the space for the neck piece, to do this i chose to use a had chisel and hammer.
I marked out the area and then using the chisel i started chiselling away the area to make space for the neck piece. This did not go to plan.
Soon after the first few knocks of the hammer i hit the chisel in too deep and splintered the wood. This then left the guitar body with parts missing as shownt in the image above. So first using an adhesive to spped up the glueing process along with some wood glue i then glued the pieces back on and left for for a few minutes. I then spoke to my tutor about the best way to route out the area needed for the neck piece. He suggested using the hand held routing machine which needed to be measured with accuracy but would shorten the time of work and would give a better finish to the space needed for the neck piece to fit better as well.
Once the routing measurements were done and the buffer which needed to be 7cm from the blade was done i then was set to route out the area needed. It took a few passes going round the edges and then crossing back and forth  through the centre of the area being cut to get the area cut fully but once done the space had a nice smooth finish for the neck to sit into and was ready for the holes to be drilled for the neck to be screwed onto the body to make the guitar look a bit more well... Guitar like. 
The next step was to mark out where my scratch plate and pick ups would sit but that was my job for the next day.

Day 2 final piece

Day 2 i was set to glue all the wood down, spreading the glue evenly i layerd the wood as quickly as posible as the glue was fast setting and so my tutor helped a little with this. 
On the middle layer i gued the bottom and top face along side the edges as i needed the glue to have a strong firm hold onto the layers of wood and so that when the guitar shape was to be cut the wood wouldnt become loose or break off.
Once glued i then clamped the wood down with every clamp that they had in the workshop, this was so the wood would grip with the glue as tight as possible on every angle across the layers. Once dry we then then left it over night to be ready to cut the next day.